I designed a new paper circuit template for a workshop at Austin Book Arts Center last weekend, and was really happy with how it worked out as an intro skill-building activity. I think it’s the most successful I’ve been so far at bringing a group of electronics beginners to a point where they felt comfortable designing their own circuits a few hours later. More info below about how I used it (and then some lovely tunnel books, which I will write more about later!)
It’s designed around the following principles that have started to emerge from my teaching techniques:
- rather than one massive example, start with an idea small enough for students to get their head around and then teach techniques for adding on.
- Scaffold early success and lower stress by anticipating and explicitly teaching the whole group how to fix and troubleshoot.
- Support agency and individual decision-making by teaching multiple options for how to do something and discussing tradeoffs.
![]()
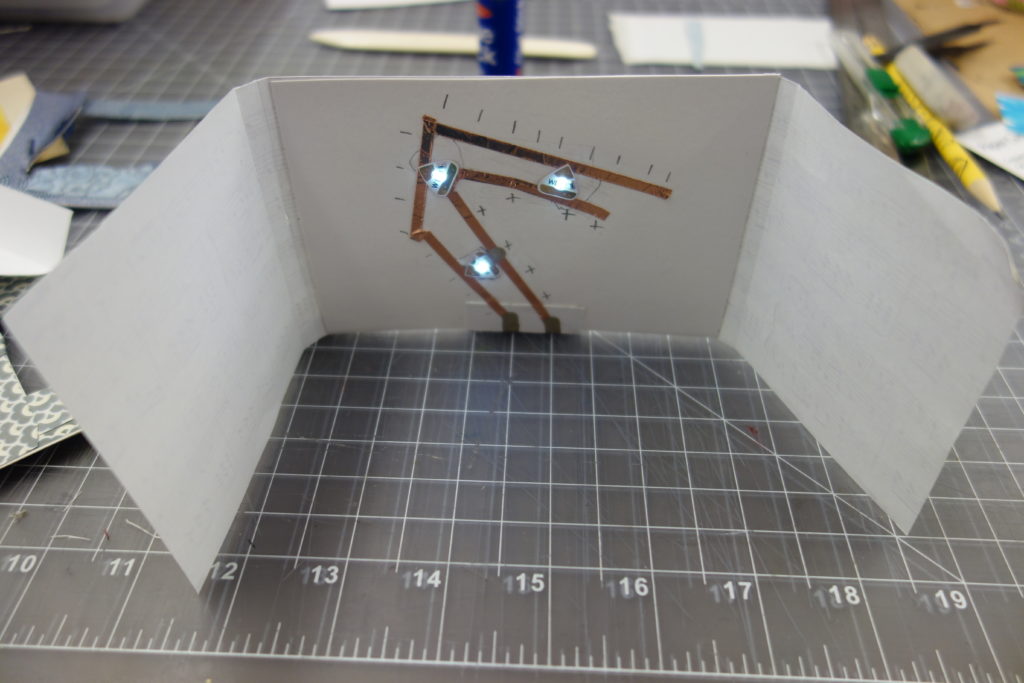
Before starting on the template, we practice folding corners using blue tape (an excellent strategy I learned from David Cole of NEXMAP). That way, students can practice the technique using a more forgiving material.
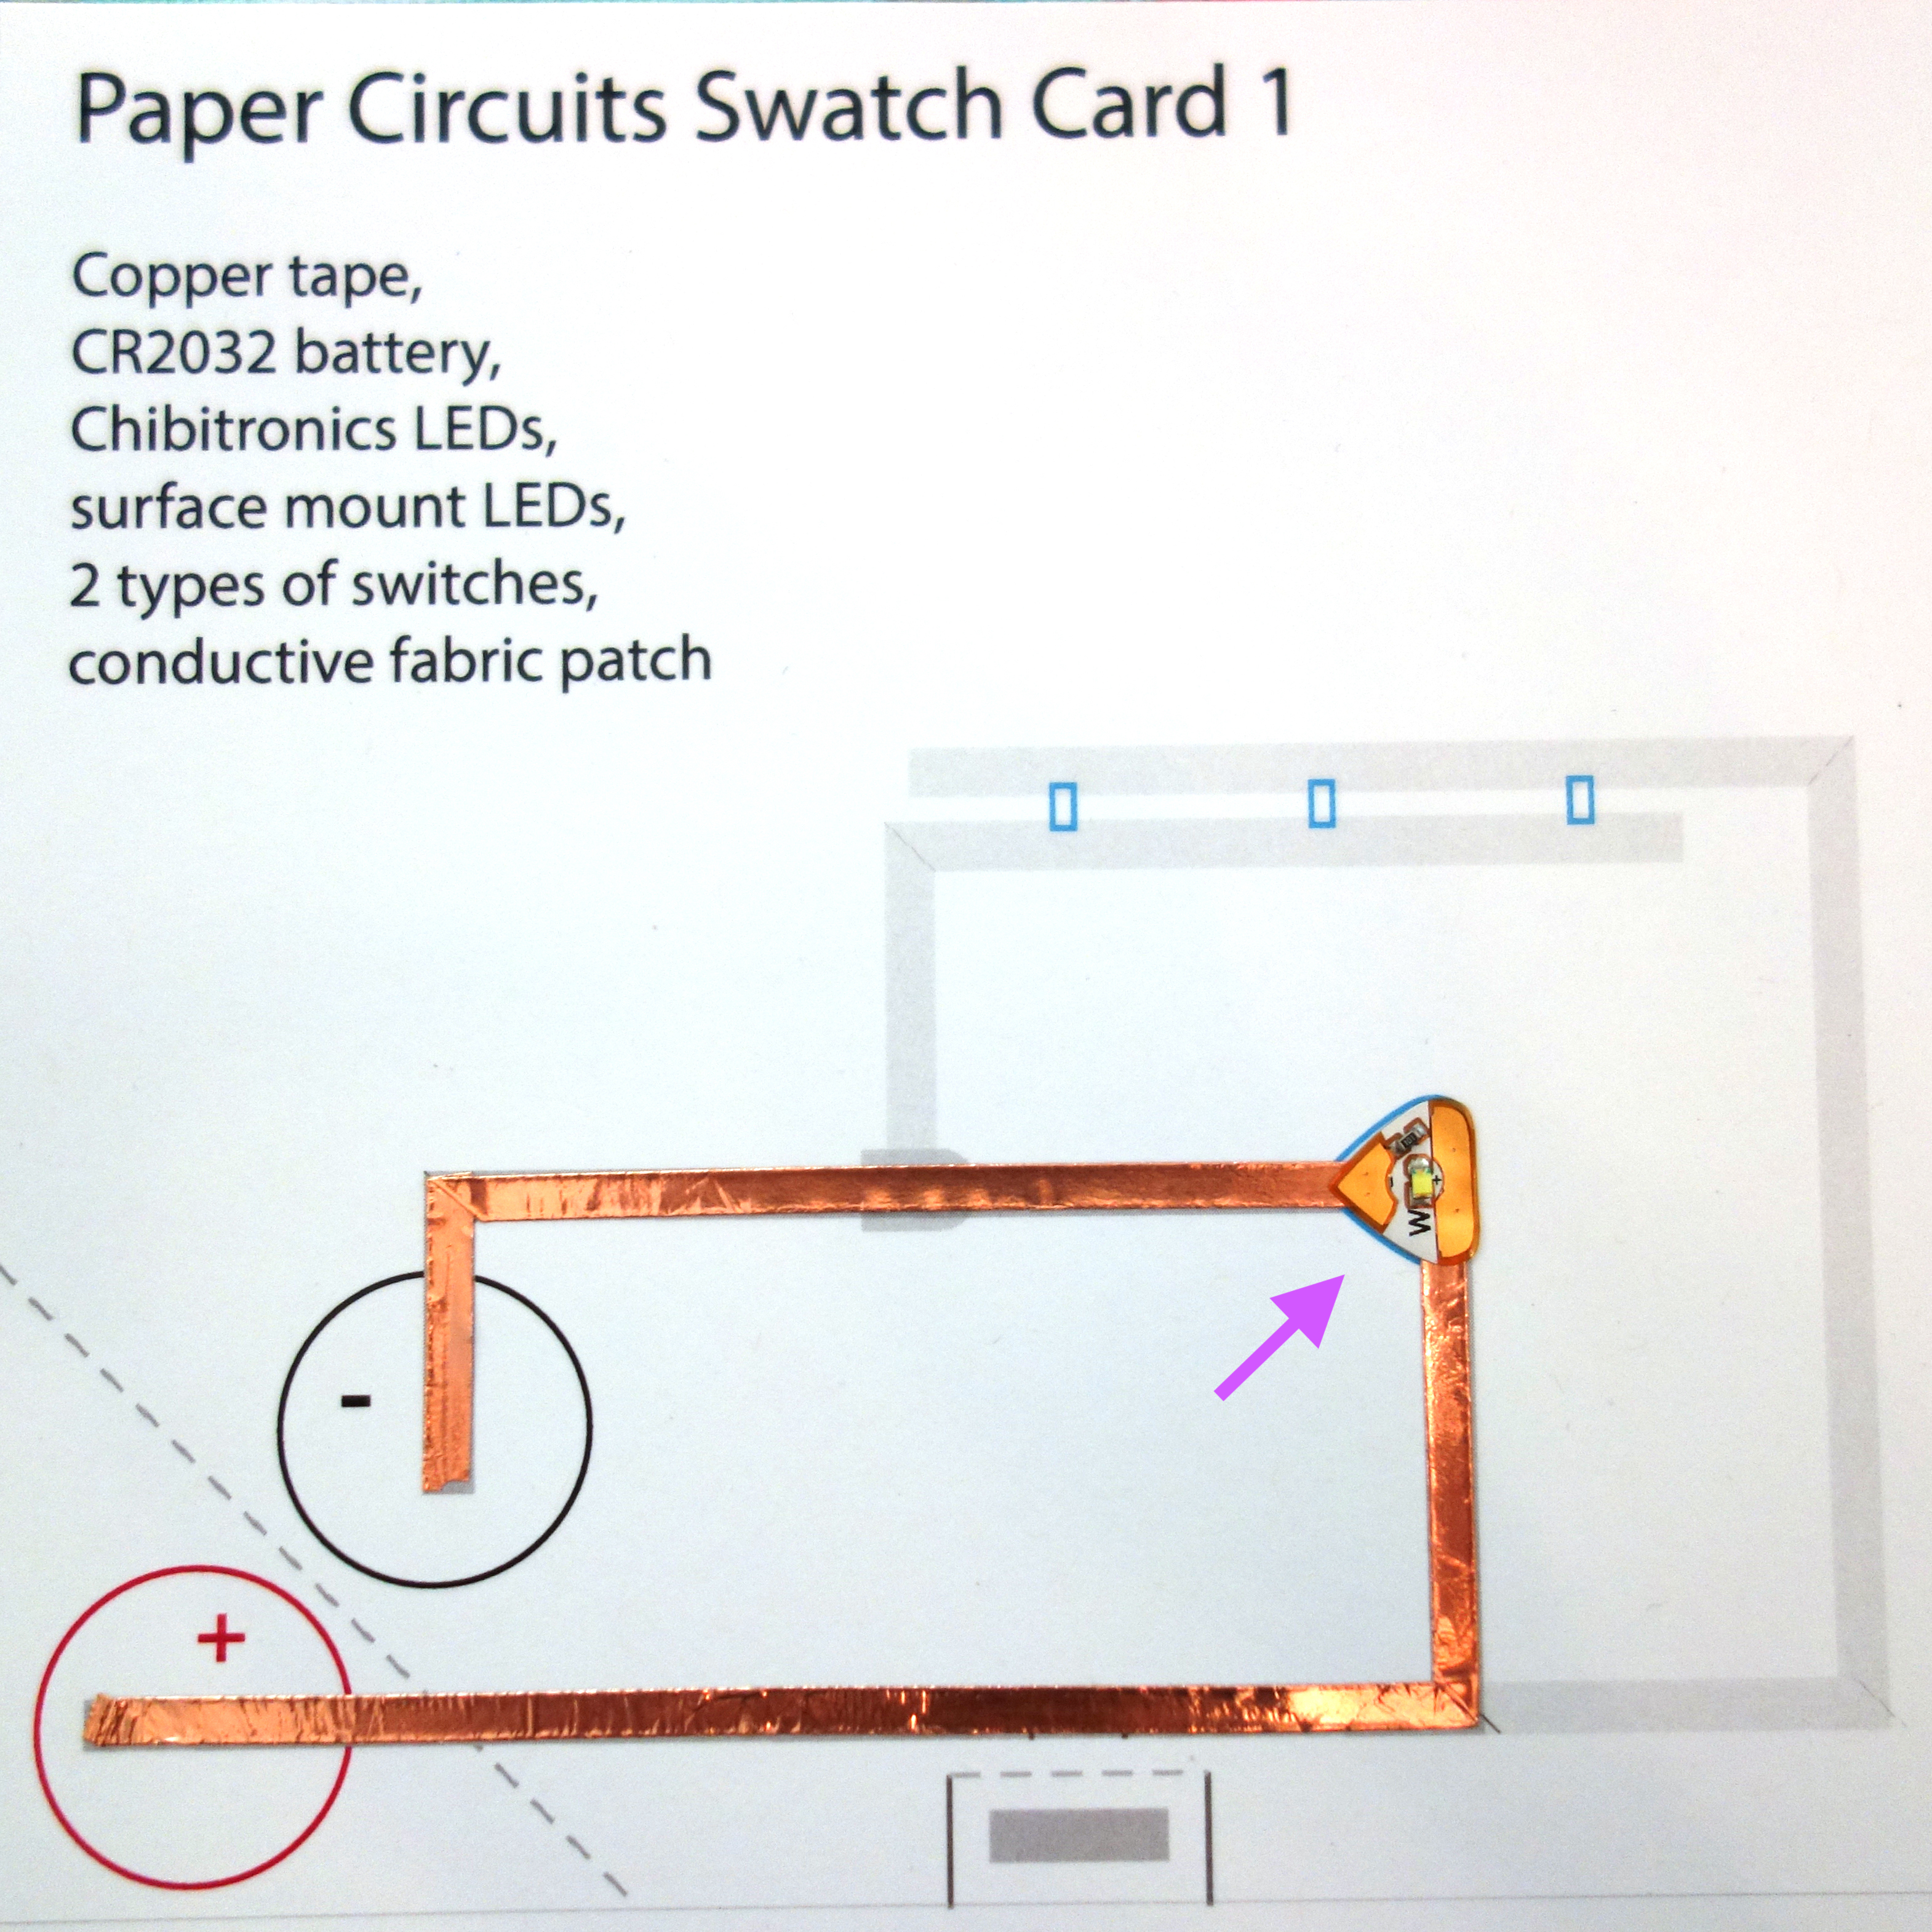
Then, students create a single LED circuit with a Chibitronics LED. Exciting moment as lights turn on! The path here is intentionally laid out to make it easier to explain how electricity flows around the circuit. I sometimes find that students have trouble visualizing it as a circular route if it is laid out in parallel lines.
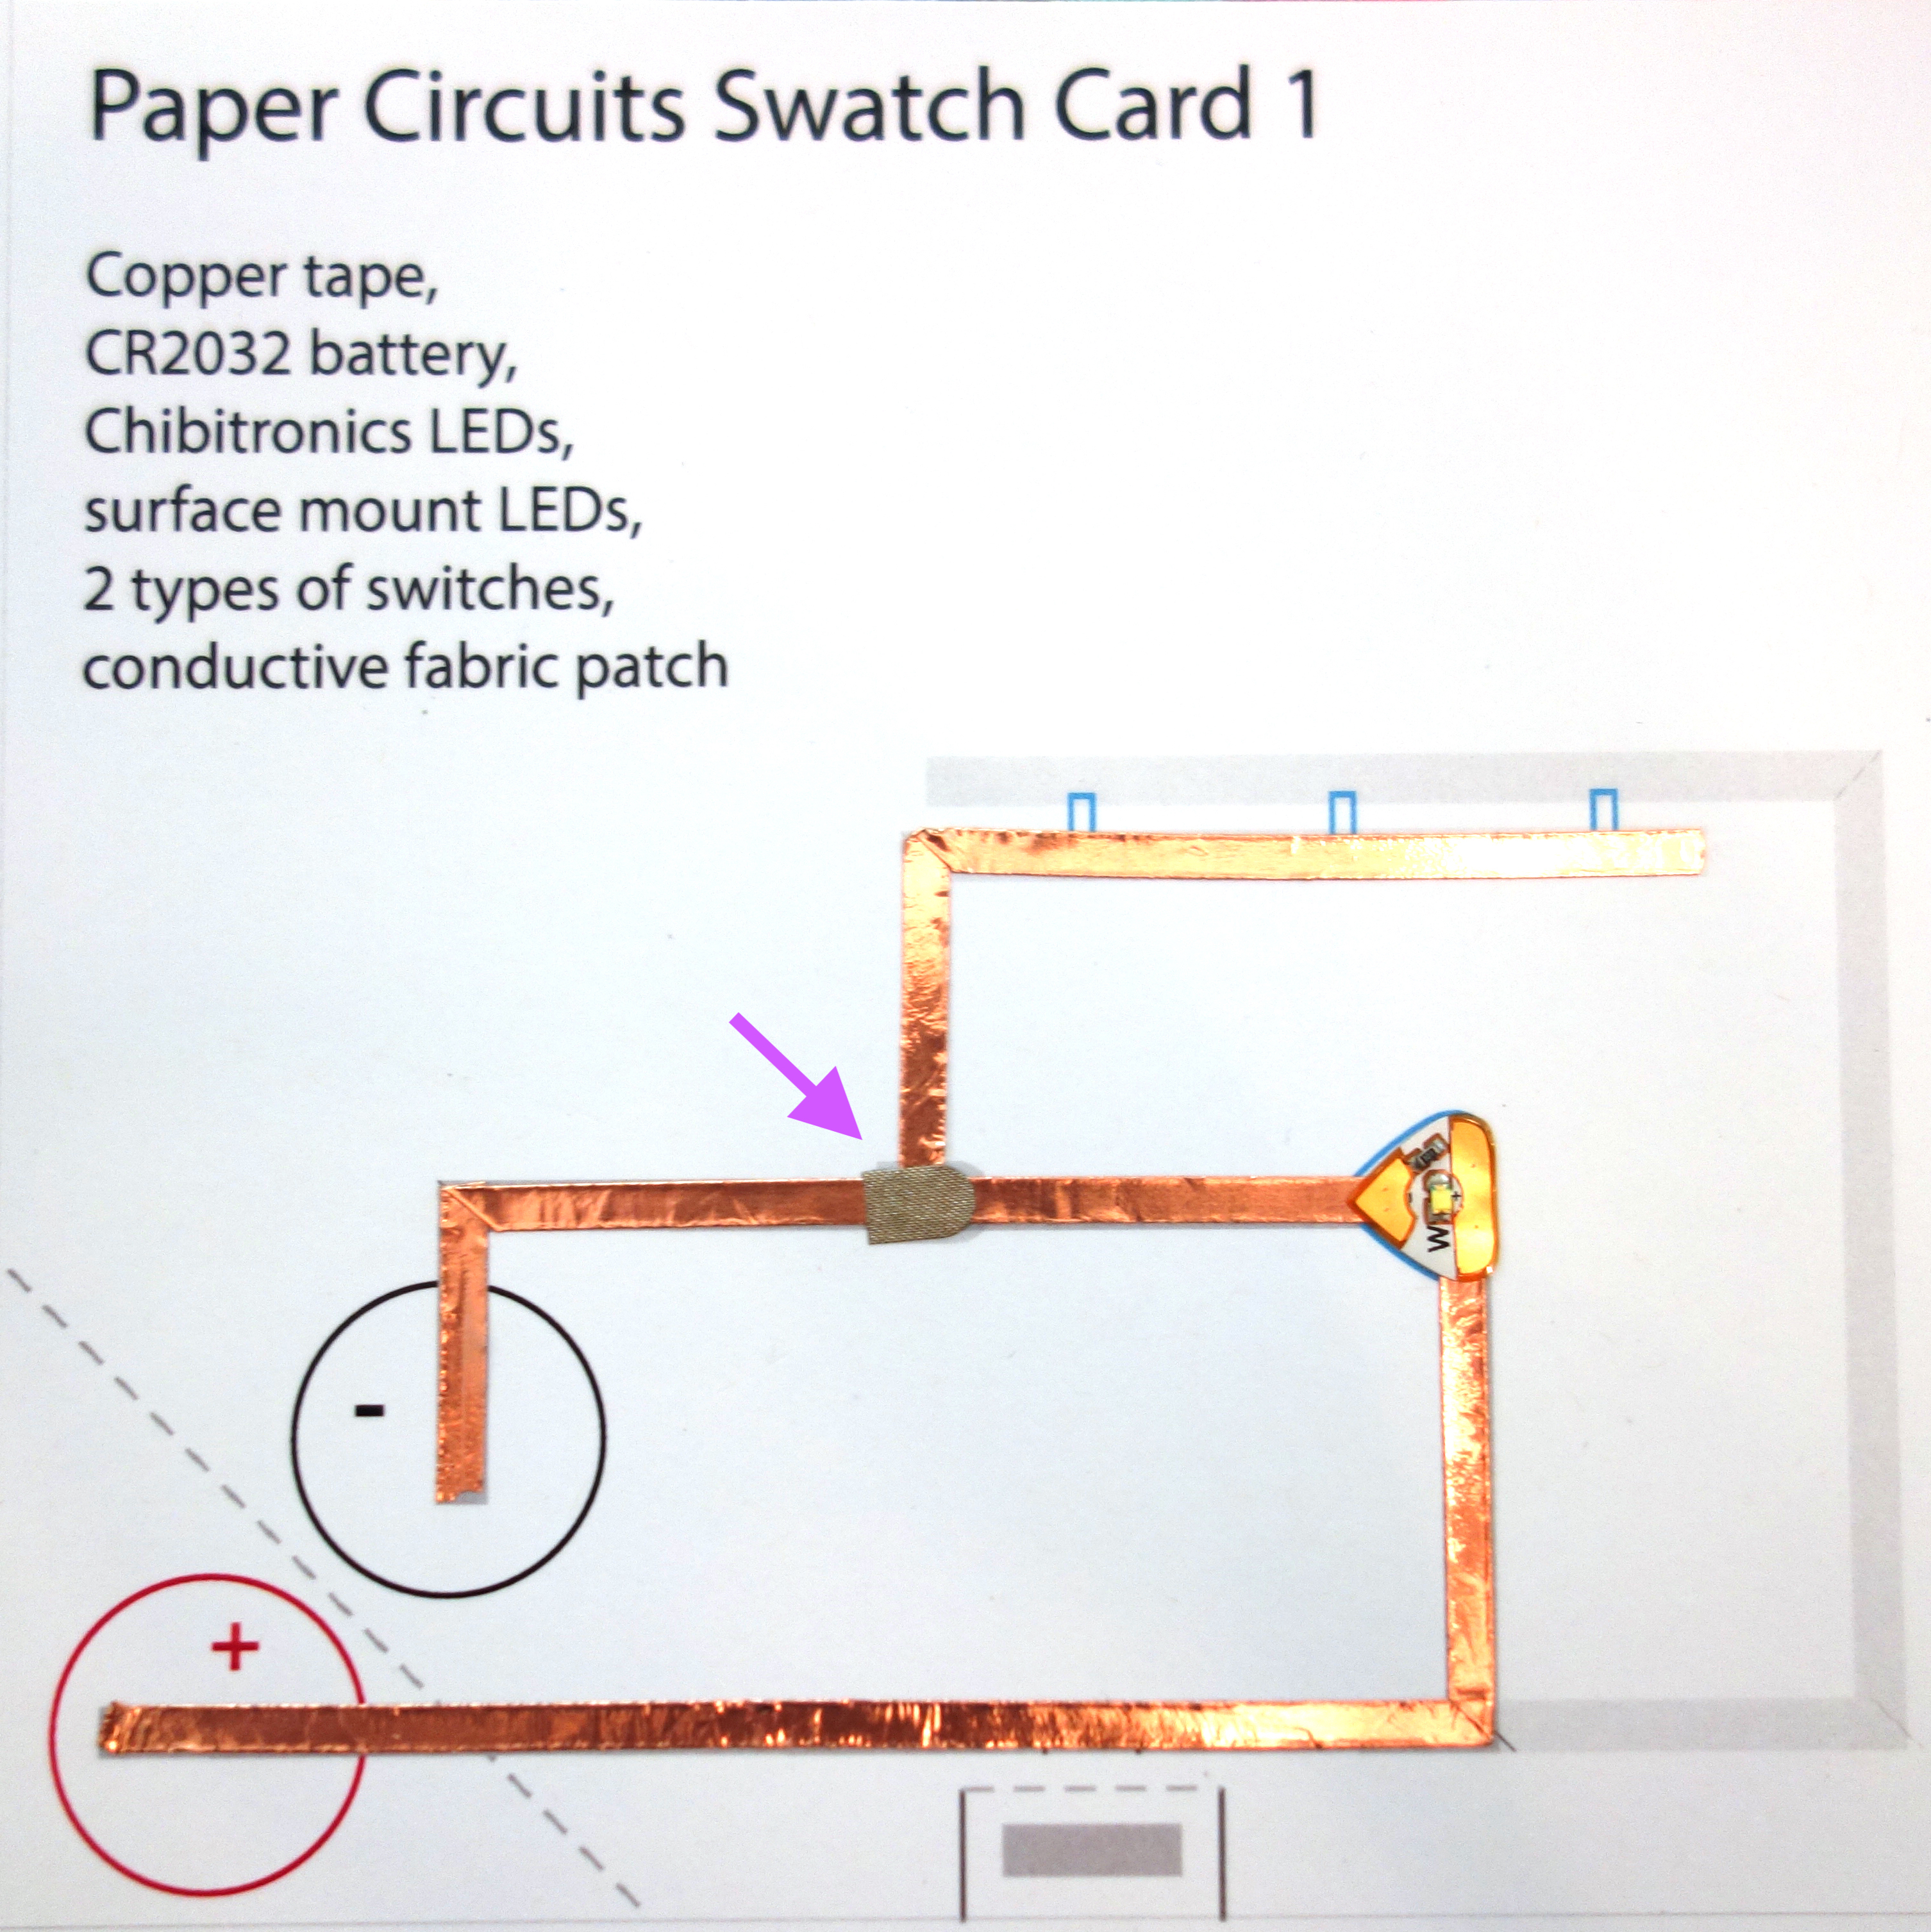
Second, we add another part to the circuit. Students use a conductive fabric tape patch to connect a new branch. That way, they learn right away how to branch and fix circuits, don’t get confused by overlapping-but-not-connected tape, and don’t feel like they’ve done it wrong if they need to patch a circuit.
Next, students learn an alternative way to patch a circuit: by folding over the end of the copper tape and covering with clear tape. I also show them that if they don’t tape it down, it becomes a switch to control a specific part of their circuit.
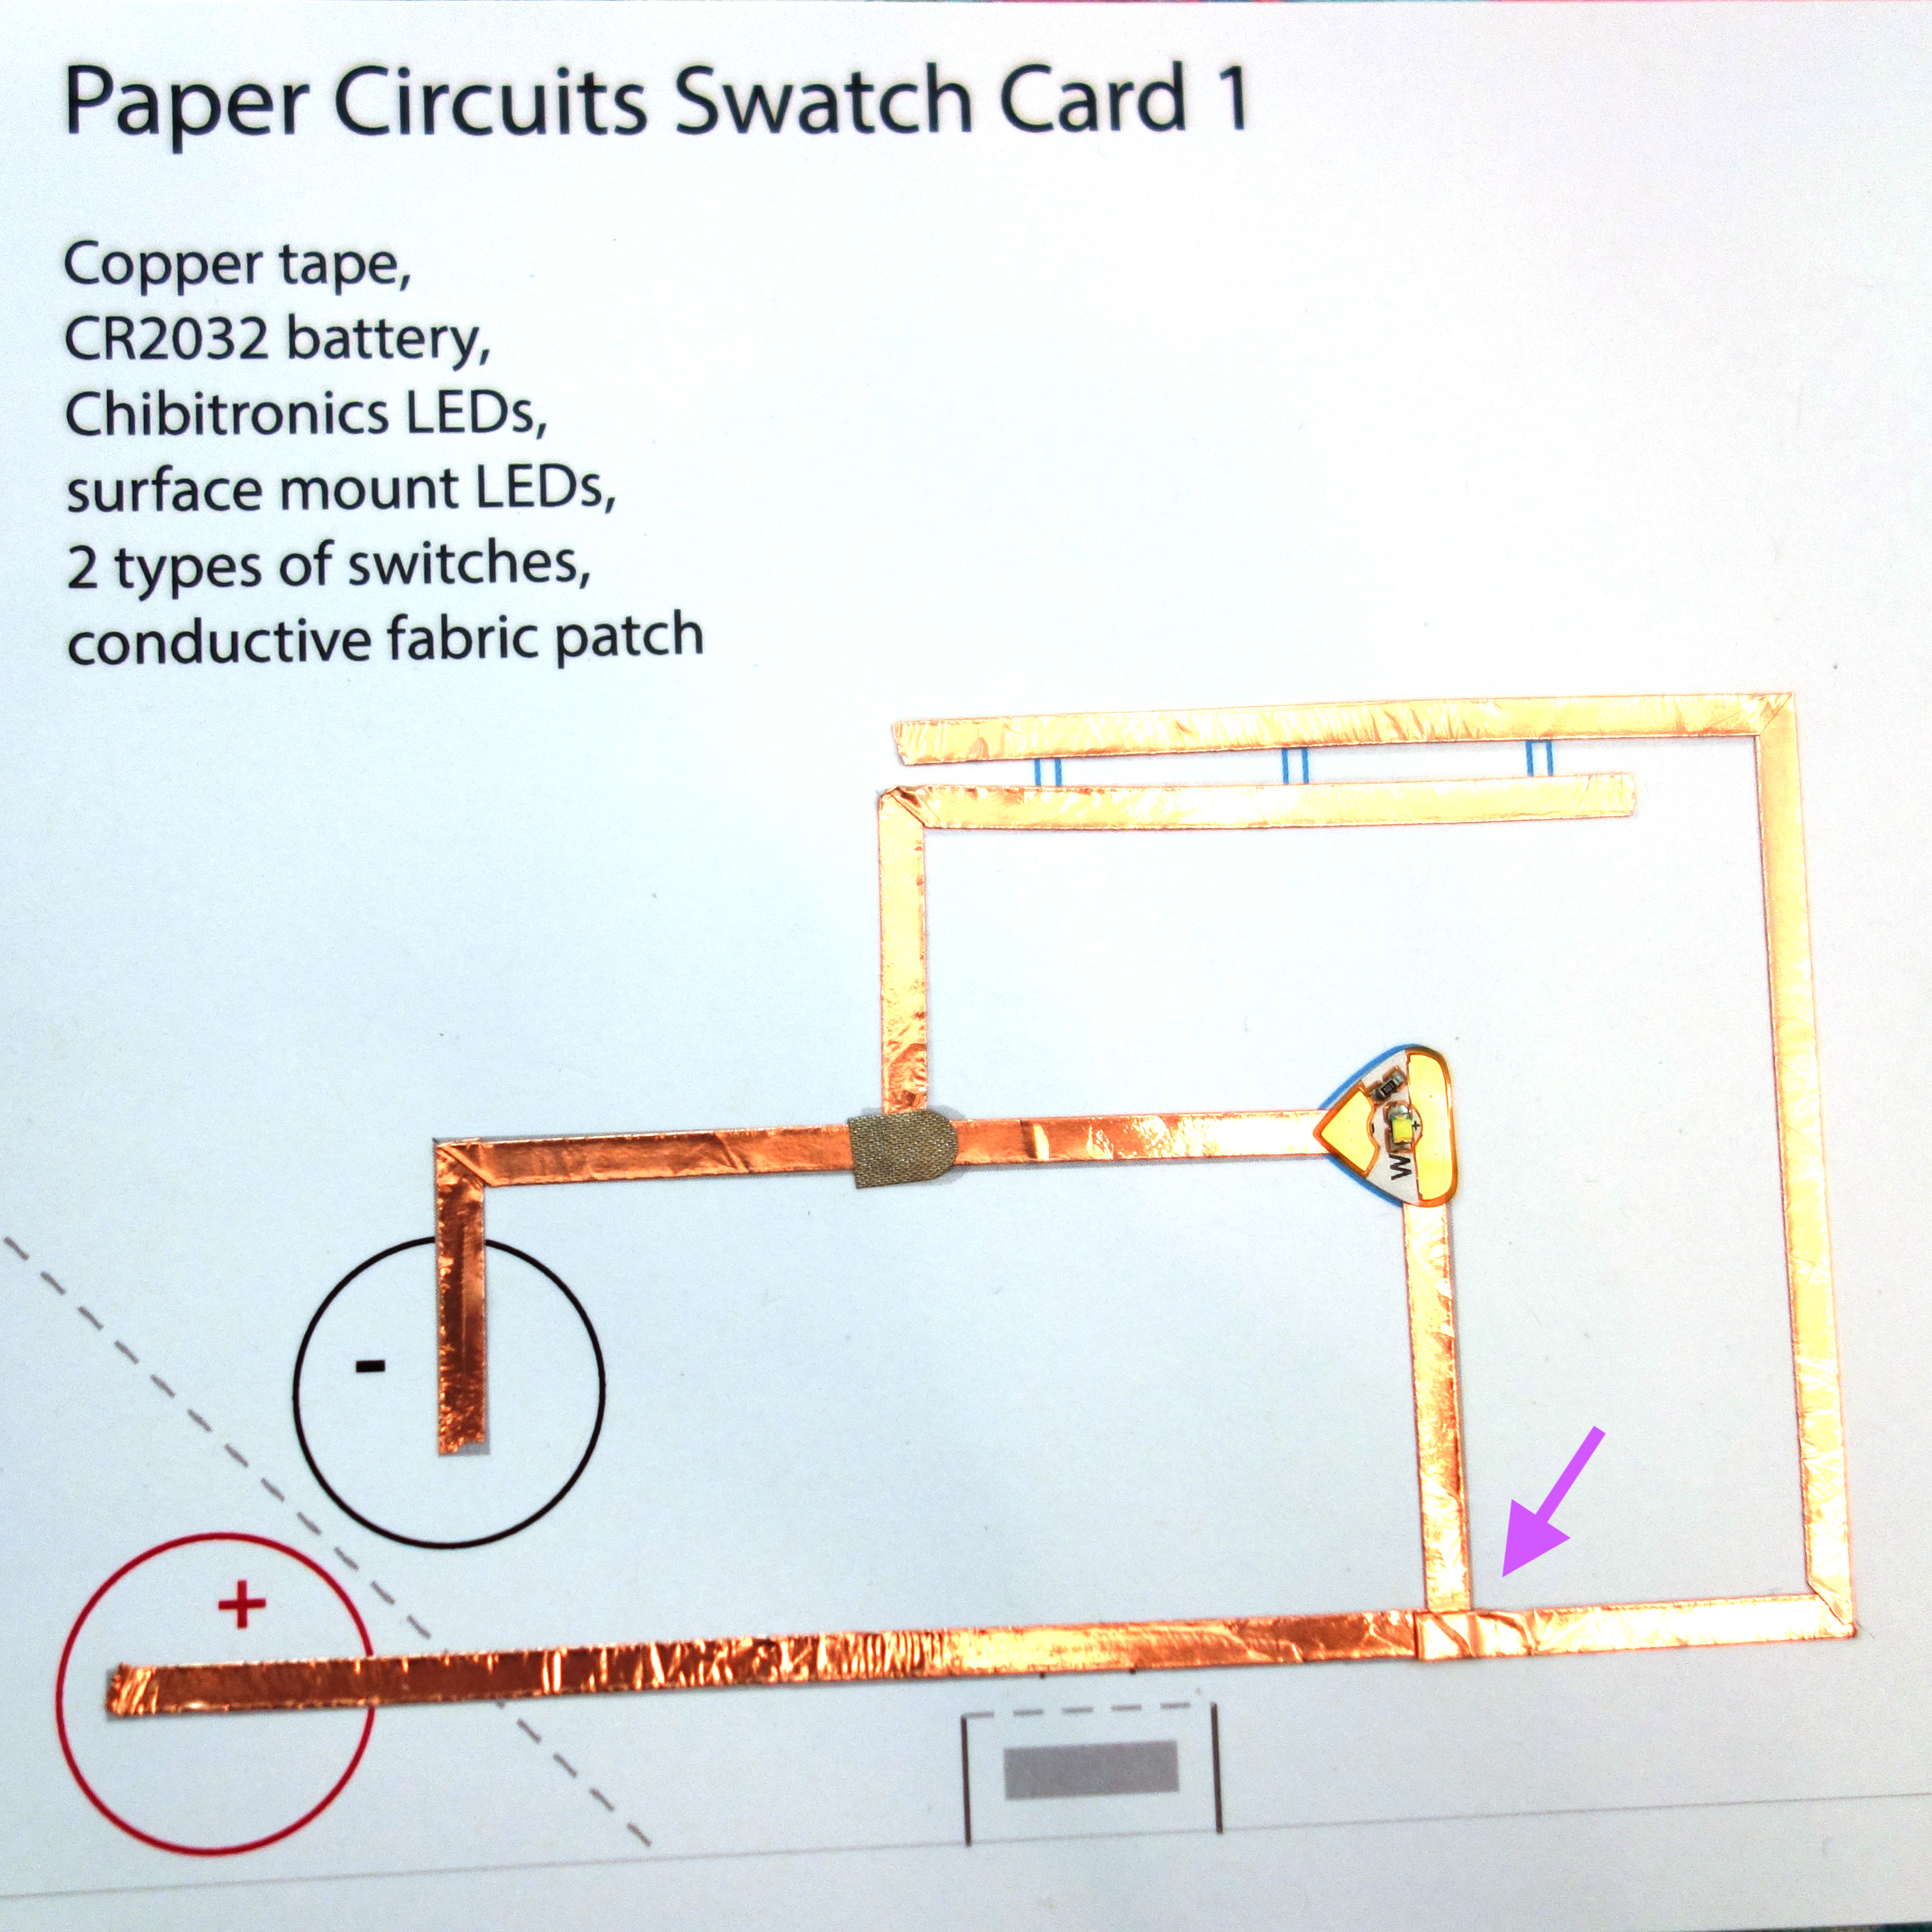
Then, we add surface mount LEDs in two different ways: using scotch tape, and then by soldering. Starting with the tape is helpful: students pick up the LEDs with the tape so they are easier to maneuver and look at. They can leave the battery connected in order to get feedback about whether their LED is positioned correctly before they commit to sticking it down. Once they understand the shape and position of the surface mount LEDs, they have a better idea how to position it for the trickier soldering version.
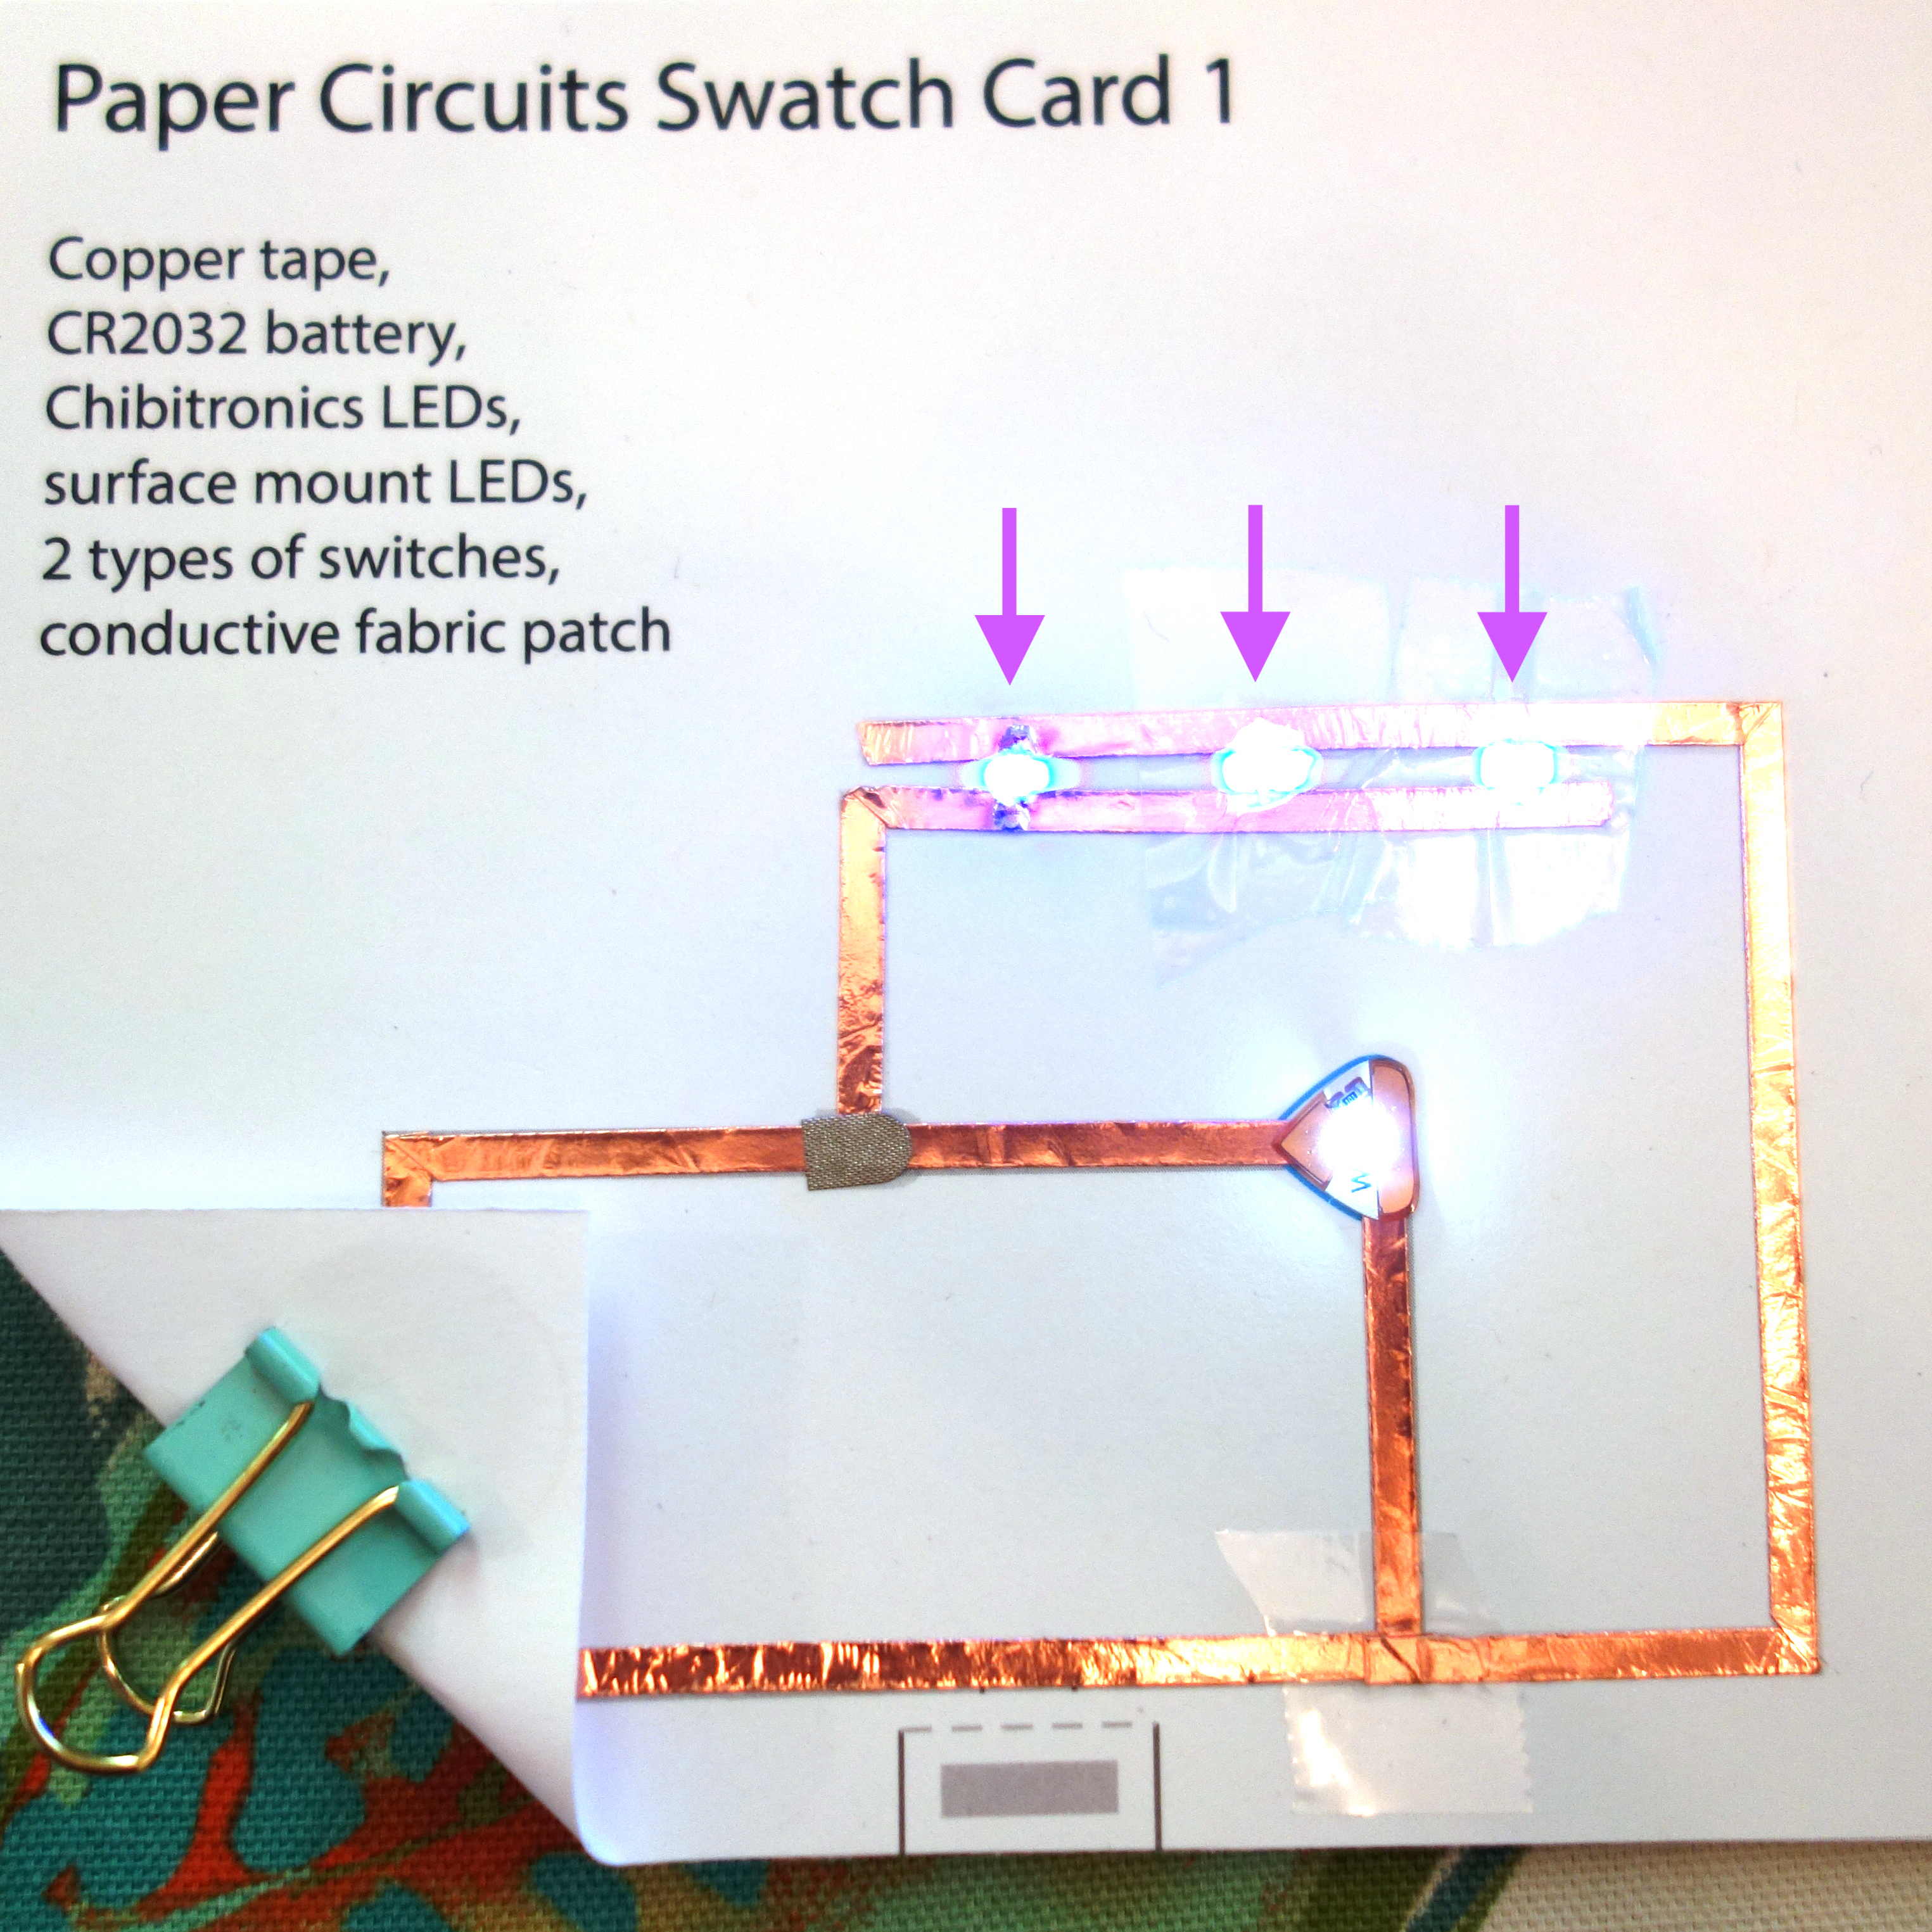
Then, we add a switch! Rather than building this into the template from the get go, I show them how to cut a gap into their circuit, and then add copper tape to a small flap to close this new gap. I think the concept of a switch is a lot easier to understand if you show it as breaking an existing circuit.

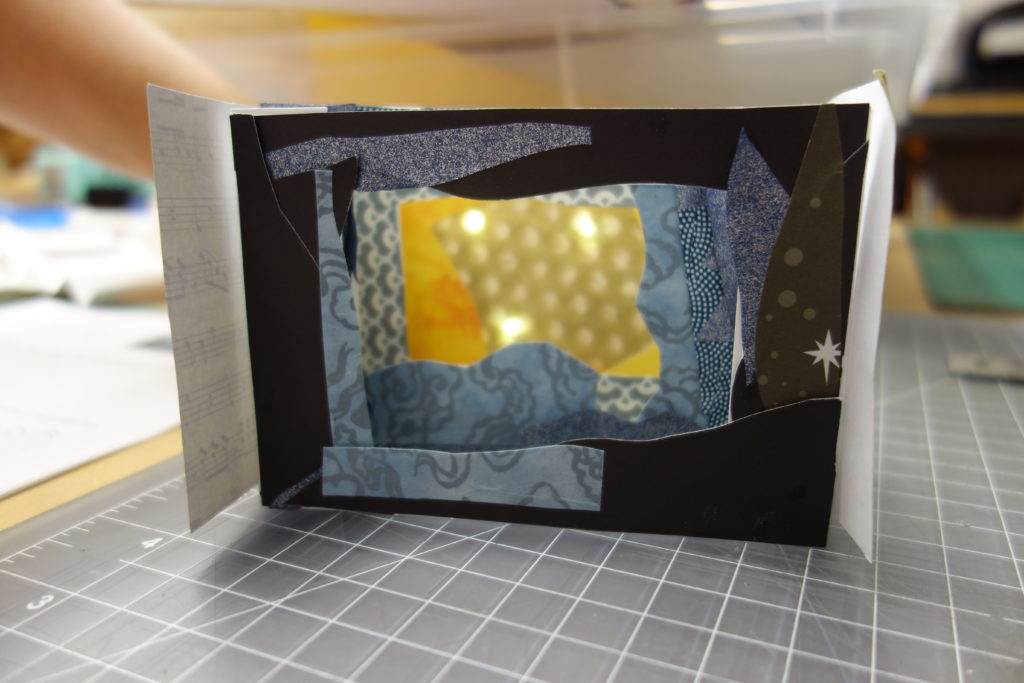
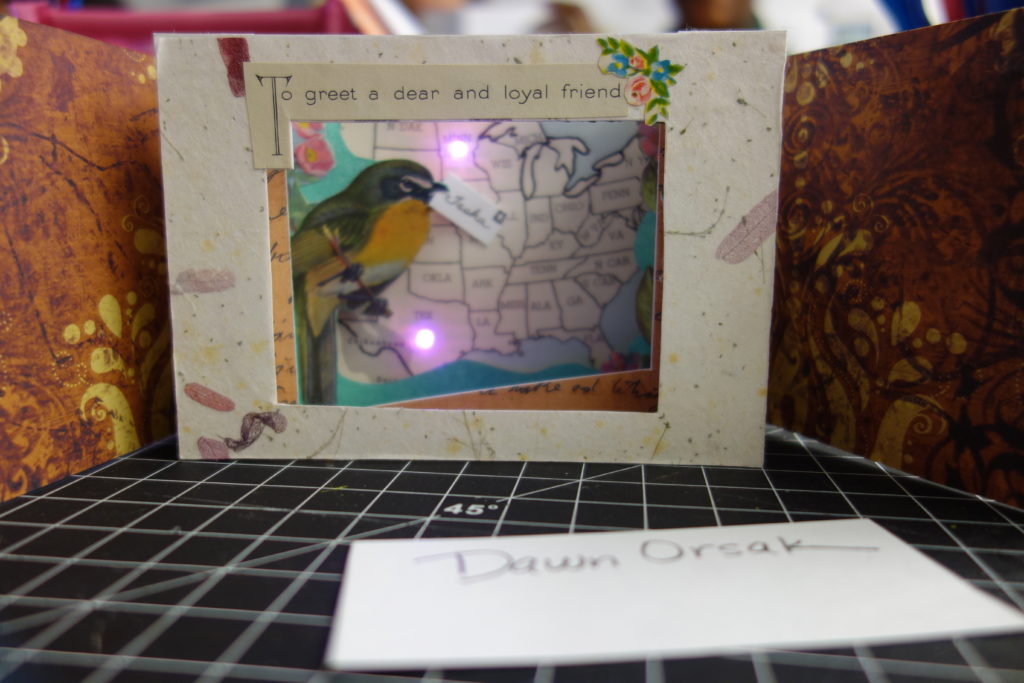
To put the template in context, it was designed as a swatch to help students learn techniques in a form they could take home and refer back to. After the template practice, each student designed a unique circuit to light up a tunnel book!
Here are some of the amazing tunnel books the students made:


Props: Jie Qi taught me lots of these individual techniques, including how to use scotch tape in a bunch of useful ways. I used one of her editable Circuit Sketchbook templates as a starting point. The three-ways-to-connect-an-LED comes from a template Becca Rose Glowacki and I developed for the original tunnel books workshop.
Also: the conductive fabric tape patches are a new release from Chibitronics and they are AWESOME. They not only make super easy patches for fixing and branching circuits, they also make excellent hinges for any part of a paper circuit that needs to fold without cracking. Great for books and pop-ups.
Feel free to use the template! You can download it here.
Leave a Reply